Chinook Concourse 2003 Renovation
Re: Chinook Concourse 2003 Renovation
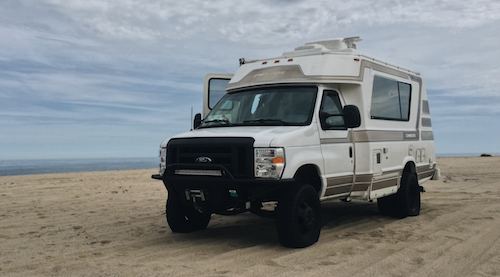
rjudice: What size are your panels? That's what I want to do (except keep the tv antenna) but didn't know how much overhang I would have on the edges with the slimmest panels I could find.
'02 Concourse where there's always a project going on...
Re: Chinook Concourse 2003 Renovation
Occurs to me that your 200 amp breaker,is there to replace and make redundant the 50 amp auto resetting breaker chinook provided,to protect against a catastrophic short?
Re: Chinook Concourse 2003 Renovation
100W panels. There is about 4 inches of overhang. Here are the dimensions: 47.4" x 21.3" x 1.38"Skillet wrote:rjudice: What size are your panels? That's what I want to do (except keep the tv antenna) but didn't know how much overhang I would have on the edges with the slimmest panels I could find.
I saw this guy's blog which helped me feel more comfortable with the overhang: http://chinookers.blogspot.com/2014/07/ ... ade_7.html
Ross
2003 Chinook Concourse
2003 Chinook Concourse
Re: Chinook Concourse 2003 Renovation
I'm installing a 60A MRBF Terminal Fuse in a Fuse Block Terminal on the positive bus bar connecting the bus bar to the charger. This is replacing the 50A auto resetting breaker (in the white box under the chassis).A Rooney wrote:Occurs to me that your 200 amp breaker,is there to replace and make redundant the 50 amp auto resetting breaker chinook provided,to protect against a catastrophic short?
The Blue Sea Systems 187-Series 200A Circuit Breaker is meant to protect my system from a electrical surge from the batteries. It also can be switched off to easily disconnect the batteries.
Disclaimer: I'm learning all this as I go along, so please correct me if I'm wrong.
Ross
2003 Chinook Concourse
2003 Chinook Concourse
Re: Chinook Concourse 2003 Renovation
- Finished upgrading the cabinet struts with Columbia struts. The previous owner replaced the mounting hardware with a lower quality version in two of the cabinets. I was able to order the original quality hardware and install the new struts.
- I installed the Curt front receiver, part # 33055. This required that I drill larger holes in the chassis, extend existing holes, and cut though the bottom of the plastic bumper to make room for the 2 inch hitch.
- Needing larger conduits for wiring access to the battery compartment, I used a hole saw to cut a 1 ½ inch hole into the floor at the driver side pillar (widening the original wiring conduit) and then cut a nasty 1 ½ inch hole through the front side wall of the battery compartment. After considering using an angular grinder to cut a rectangular hole in the front side wall to install PVC box, I decided just to line the hole with Eternabond tape. Not very elegant but functional.
- I pulled all the upgraded wiring into the battery compartment.
- Ran some ground wire from the above-cabin cabinet down to the chassis for the ham radio and antenna tuner.
- Inspected all of the ground connections at the chassis (near the battery compartment, near the black tank, near the generator) and noted that they are all appear corroded and covered in rust.
- Attachments
-
Ross
2003 Chinook Concourse
2003 Chinook Concourse
Re: Chinook Concourse 2003 Renovation
Question: Does anyone know what the on/off switch located on the driver door (next to the side view mirror controls) is for? Thanks.
Ross
2003 Chinook Concourse
2003 Chinook Concourse
Re: Chinook Concourse 2003 Renovation
Disregard my last post. The on/off switch is apparently controls the heating of the mirrors.
Ross
2003 Chinook Concourse
2003 Chinook Concourse
Re: Chinook Concourse 2003 Renovation
Pull that 7.5 amp fuse and see if your rear entry light still works, the one nearest the closet. 
Re: Chinook Concourse 2003 Renovation
Update:
- New slat sofa/bed and cushions
- New cabinet with Wave 6 catalytic heater and USB ports
- New wood flooring
- Installed a Progressive Industries EMS-HW30C Hard-Wired Portable Electrical Management System - 30 Amp
- Installed Marinco (30ARVKIT) 30 Amp Detachable Power Conversion Kit. This is a terrific solution for creating a detachable power hookup.
- Attachments
-
-
-
Ross
2003 Chinook Concourse
2003 Chinook Concourse
Re: Chinook Concourse 2003 Renovation
Here's a look inside the cabinet and upgrading the shower to the ETL 26781 White Body Spa Oxygenics Shower with 60" Hose
- Attachments
-
-
-
Ross
2003 Chinook Concourse
2003 Chinook Concourse