Full solar system install with pictures, tears and all :)

Split from General / Technical for discussion of anything electrical, electronic... 12v, Inverter, Satellite, Headlights, flashlights etc.
User avatar
Blue~Go
Senior Member
Posts: 3797
Joined: July 31st, 2014, 1:01 am
Location: 1999 Concourse

Re: Full solar system install with pictures, tears and all :)

Post by Blue~Go »

And doesn't that pillar cover look nice :D

It's interesting that you couldn't get it in without removing the seat. I was easily (for pillarly definitions of easy) able to get mine out (but still kinda in place) and then back in (before I realized I'd be taking it out completely) and then back out (completely out of the Chinook) with the driver's seat in place. So you'd think it would also go back in.

One thing I noticed is that your Flexsteel driver's seat looks like it extends way back into the coach. I have Flexsteel seats too but a slightly different model. Maybe mine tuck up forward a bit more? Or maybe I could get my pillar out but not back in (although that seems to be against physics; but then having put new covering on the things I'd say they do defy physics in some ways :x ).

Rooney has had his out and in; I wonder if he removed the driver's seat?

I also have my passenger one out, but I kind of cheated on that one as I don't normally run with a passenger seat (have a custom tool box/map table there when I'm solo; seat when I have people along) so it was already out. Oh the glorious working space!

Which, there's no reason not to take out the driver's seat anyway because: Glorious working space! I haven't done my cab yet, but we did my buddy's same Ford cutaway -- removed the carpeting and put down real sound deadening material (two kinds) plus new vinyl (he didn't want carpet). We also put heat shield material inside the doghouse. I have GOT to do that to mine (which I call "the furnace").

Anyway, back to yours: Ah, looks so nice! And the flap is where it is meant to be, BEHIND the wall.
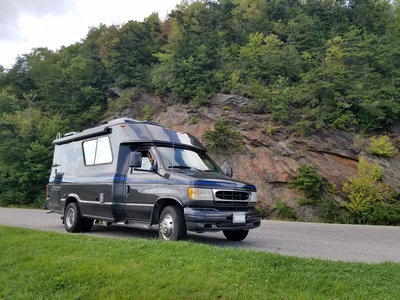
1999 Concourse
68camaro
**Forum Contributor**
Posts: 671
Joined: May 16th, 2018, 4:49 pm

Re: Full solar system install with pictures, tears and all :)

Post by 68camaro »

Blue~Go wrote: March 17th, 2019, 3:45 pm I also have my passenger one out, but I kind of cheated on that one as I don't normally run with a passenger seat (have a custom tool box/map table there when I'm solo; seat when I have people along) so it was already out. Oh the glorious working space!
What a shock to hear coming from you :lol: Can you post a pic, most of my travel is alone and it might be nice project idea to steal :mrgreen:
2001 Concourse XL Lounge model, 6.8L Ford E350 Triton V-10 Chassis.
User avatar
Dano
**Forum Contributor**
Posts: 311
Joined: August 23rd, 2018, 4:24 am
Location: Ottawa, Canada

Re: Full solar system install with pictures, tears and all :)

Post by Dano »

Well, if there is a better way, I would certainly be open to it! To get mine back in, I had to get the top corner in behind the wall panel (top circle) which means the pillar cover had to be rotated towards the hot water tank AND put in on an angle by pulling the bottom out towards the furnace. The LVD prevented the panel from really being rotated out which would have helped a lot. Also, there is an angle that sticks out on the bottom of the panel that goes over the two floor heights making trying to angle it up, very tight because then it hits the ceiling. I had to use a small pry bar to pull the wall board back so I could tuck the edge of the cover in behind and had to do it inch by inch from top to bottom. Finally, the ledge the bed sits on is very tight to that corner and also prevents the panel from being rotated into position. I am pretty confident that this panel was put in first when they made the Coach and everything else was layered on top with nothing in the way which would have been easy. The whole re-install was 20-30 minutes and wasn't easy by any stretch of the imagination. I hear some small cracking sounds occasionally which was pretty nerve racking since these panels are irreplaceable. In any event, if anyone can chime in with a better way, I'm always open to learning 8-)

For this threads solar purposes, I'm glad I ran the wiring in behind it because I had full access to the panel inside because someone else forced my hand but would caution anyone thinking about removing the panel on it's own and having to re-install it, it's a lot of work. AND, my beds were out. I don't think I would have a problem thinking you would also need to remove your couch to do this job as well. Running the charge controller wires another way might be easier. Am I glad it's in? Absolutely! Would I go out of my way to re-do it from scratch? No.
Attachments
Panel.jpg
"Jewels" - '02 Chinook Concourse XL
User avatar
Dano
**Forum Contributor**
Posts: 311
Joined: August 23rd, 2018, 4:24 am
Location: Ottawa, Canada

Re: Full solar system install with pictures, tears and all :)

Post by Dano »

Close up of things that prevent rotation of the panel so you can get the edge behind the wall panel: the bed support ledge and the panels front covering edge. This little downwards cover, prevents the panel from being lifted upwards as you rotate because when it gets over the Coach floor which is about an inch and a half higher than the cab floor, it makes the panel taller. The panel then get very tight across the overhead cabinet and has to be compressed top to bottom which is difficult since it's fiberglass, all the while trying to get the edge behind the wall panel up top. Hope all this makes sense!
Attachments
Edges.jpg
"Jewels" - '02 Chinook Concourse XL
User avatar
Dano
**Forum Contributor**
Posts: 311
Joined: August 23rd, 2018, 4:24 am
Location: Ottawa, Canada

Re: Full solar system install with pictures, tears and all :)

Post by Dano »

Charge controller day! As Clay has pointed out, the original opening for the Sunforce controller is too small and needs to be enlarged. An 1/8" on both sides will do it. I used a ShopVac for all the dust collection, I suggest you do the same. My DeWalt multi tool made short work of the trimming, ugly but effective: sort of like me! :lol: Will wait for the final install for when the wires are ready to be connected...
Attachments
6187.jpg
6188.jpg
6191.jpg
6192.jpg
"Jewels" - '02 Chinook Concourse XL
User avatar
Dano
**Forum Contributor**
Posts: 311
Joined: August 23rd, 2018, 4:24 am
Location: Ottawa, Canada

Re: Full solar system install with pictures, tears and all :)

Post by Dano »

Highly exciting shots of wires zip-tied loosely in place until final lengths are determined as well as final connections made...I can still pull each wire from outside under the Coach, all the way to the charge controller
Attachments
6194.jpg
6193.jpg
"Jewels" - '02 Chinook Concourse XL
User avatar
Blue~Go
Senior Member
Posts: 3797
Joined: July 31st, 2014, 1:01 am
Location: 1999 Concourse

Re: Full solar system install with pictures, tears and all :)

Post by Blue~Go »

Question on the pillar (yes, I'm still curious): You mentioned the LVD being in the way, but on mine the LVD was not behind the pillar, but rather in front of it, mounted to the lower section of the pillar, and then hidden under a little box that is part of the forward couch panel. So the couch "side" panel was removed first (which includes the LVD cover), then the LVD was removed, then the pillar. So for putting the pillar back the LVD wasn't part of equation (until after the pillar was back).

Mine weren't super easy, but they weren't so hard that I would say not to do it. Wondering if there is a specific year/feature that changes that equation (I can't see your year info now that I am in the reply box).
1999 Concourse
User avatar
Dano
**Forum Contributor**
Posts: 311
Joined: August 23rd, 2018, 4:24 am
Location: Ottawa, Canada

Re: Full solar system install with pictures, tears and all :)

Post by Dano »

I could have taken the LVD off yes and that would have gotten it a bit out of the way but didn't feel like disconnecting all the wires to do so and risk screwing them up. Even with the LVD gone, I still had to rotate the panel towards the kitchen to get the panel edge behind the wall panel. I mean, if you have to do it then I guess you have no choice like I did but I woudln't be going out of my way to try and reset it. Maybe I was working against myself, who knows. But, I had to use a pry bar to get the wall panel pulled away enough to "just" get the edge of the side panel in enough for it to go...Not sure about differences in years. Don't get me wrong, it wasn't building a pyramid but I dropped a few F bombs I can tell you that for free...
"Jewels" - '02 Chinook Concourse XL
User avatar
Dano
**Forum Contributor**
Posts: 311
Joined: August 23rd, 2018, 4:24 am
Location: Ottawa, Canada

Re: Full solar system install with pictures, tears and all :)

Post by Dano »

Anyways,an easier job today was to drill two new access holes in my battery box, install rubber grommets and pull the charge controller wires through, ready to have inline fuses and ring connectors attached!
Attachments
5354.jpg
"Jewels" - '02 Chinook Concourse XL
User avatar
Dano
**Forum Contributor**
Posts: 311
Joined: August 23rd, 2018, 4:24 am
Location: Ottawa, Canada

Re: Full solar system install with pictures, tears and all :)

Post by Dano »

Blue;
Looks like you are right! I had to do my final tightening of my seats down to the floor so I moved the drivers seat forward. It looks like you could swing the side panel and just clear the seat without removing the seat as you suggested. I'm still glad I had it out and was grateful for the extra room but I think you could get it in and out without going the extra mile. Just an FYI...
Attachments
6200.jpg
"Jewels" - '02 Chinook Concourse XL
Post Reply