Driver Side Power Window...kaput...
-
HoosierB

- **Forum Contributor**
- Posts: 473
- Joined: May 21st, 2015, 7:00 pm
- Location: South Bend, Indiana
Driver Side Power Window...kaput...
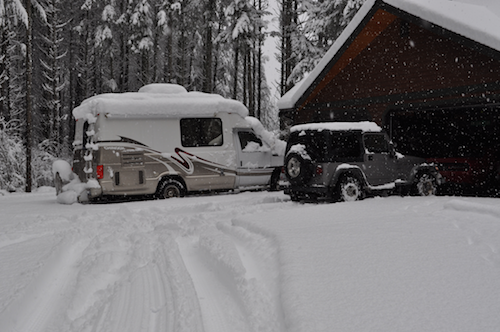
Went out to the garage to work on the Chinook today, only to find the driver side window was completely down (open). Odd, because a few days ago it was fully "up" and working as normal. My rig is constantly hooked up to a 30amp outlet and in storage mode for the winter. When I started up the engine, and tried the power window switch, I could hear/feel the motor working... but no window movement. What would cause the window to "fall down" on it's own? Bad/weak motor, or is this something else?
"Wanda" – '01 Chinook Concourse XL V10
Re: Driver Side Power Window...kaput...
You probably need to take the door apart to see if you can spot any mechanical issue with how the motor is attached to the glass. Does the glass come up when you pull it up, or it is still held down like it should?
2000 Concourse dinette, on 1999 6.8L Ford E350 Triton V-10 Chassis
Re: Driver Side Power Window...kaput...
On the Glacier with the E450 chassis, when that happens, the door/window motor assembly has broken. Ford does not have parts to repair the assembly. A new complete window motor assembly Is required. At my local Ford truck center, it was $496 for parts and labor to repair. On the Concourse it may be a different situation. And, it is possible that there are after market sources for the assembly.
Re: Driver Side Power Window...kaput...
This is one of the reasons I like all-manual systems. I fixed the window on my '84 Chevy, but for the newer Honda Odyssey, there are like 3 computers on the sliding door alone that I can't fix without replacing the modules.
2000 Concourse dinette, on 1999 6.8L Ford E350 Triton V-10 Chassis

Re: Driver Side Power Window...kaput...
If it is the motor, it's only about $40 to replace. I made a post a while ago because it is the same motor that can be used on your power steps. Easily available on Amazon...Does it make a sound going up as well as down and it's still not moving? Sounds like a linkage issue. You can get the door panel off in 10 minutes or less. Probably one or two screws plus some friction clips. Sounds harder than it actually is....
"Jewels" - '02 Chinook Concourse XL

Re: Driver Side Power Window...kaput...
I've had both door panels off (replaced speakers). I watched a few videos which were quite helpful. I hate prying plastic bits until I know where they are supposed to snap. (I might have described it in an old thread but I can't remember).
1999 Concourse
-
ASaucyBurrito
- Posts: 46
- Joined: November 2nd, 2018, 5:48 am
- Location: SW MI
Re: Driver Side Power Window...kaput...
I will be making this repair soon on my '93. I can take some pics and do a step by step if you're interested.
I typically purchase the entire window regulator assembly when replacing these and did in this case. Sometimes you can buy the motor separately but the cables and guides age as well. I purchased the AC Delco unit from Rockauto for $67 - not the cheapest but they are typically quality.
I typically purchase the entire window regulator assembly when replacing these and did in this case. Sometimes you can buy the motor separately but the cables and guides age as well. I purchased the AC Delco unit from Rockauto for $67 - not the cheapest but they are typically quality.
1993 Chinook Concourse XL
-
HoosierB
- **Forum Contributor**
- Posts: 473
- Joined: May 21st, 2015, 7:00 pm
- Location: South Bend, Indiana
Re: Driver Side Power Window...kaput...
Any pics you can provide would definitely help even though mine is a '01. Per Dano, I ordered a motor from Amazon for about $40, just in case.ASaucyBurrito wrote: April 2nd, 2019, 6:20 am I will be making this repair soon on my '93. I can take some pics and do a step by step if you're interested.
I typically purchase the entire window regulator assembly when replacing these and did in this case. Sometimes you can buy the motor separately but the cables and guides age as well. I purchased the AC Delco unit from Rockauto for $67 - not the cheapest but they are typically quality.
"Wanda" – '01 Chinook Concourse XL V10
-
ASaucyBurrito
- Posts: 46
- Joined: November 2nd, 2018, 5:48 am
- Location: SW MI
Re: Driver Side Power Window...kaput...
Got around to replacing my drivers side window regulator last weekend. The process was pretty easy.
This is for a 1993 Chinook / E350.
Removal
First step is removing the door panel.
First remove the visible screw in the upper right and pull the black panel off. Then there are three screws you need to remove to allow the door panel to be removed. Unscrew all of them, and then remove the surround for the door handle. The window switch panel should lift away from the rest and will need to be fished through the opening when you remove the panel itself (do not disconnect the switch panel, you don't need to).
My door panel needed to be lifted up and out, as it is secured with a few "L" shaped pieces of plastic that interface with the metal door. Once you get it off, twist the light bulb out of the socket, fish the window switch panel through and you should be good.

Next is window regulator removal. My window was being held up by a piece of wood (thanks previous owners) but the regulator was still connected to the glass itself. First step is disconnecting the glass from the regulator. Note in the pictures removed my vapor barrier was already compromised by the previous owner, you may need to remove it to access some of these locations. You can either try to gently pry the barrier away, or cut it as my previous owner did. I won't judge you either way.

The black piece in the picture above is attached to the window permanently and is what holds the glass to the regulator. There are two bolts or rivets holding the components together. My regulator was replaced previously and has bolts, but OE is apparently rivets. You need to move the window down far enough to access both the visible bolt/rivet, and the one you can't see here.

The yellow marked holes are where you can access both of the window mount bolts/rivets. Remove those and manually slide the window to the top and tape it in place.
The regulator is held in place by four bolts (blue) and the motor by three (green). Remove the four bolts first, followed by the motor bolts. Disconnect the motor electrical connector (purple). The regulator should then be free to be removed through the large access hole to the left.
Installation
Essentially the opposite of what you just did.
Bring the new regulator into the door. Note the motor sits on the right while the cables exit the track on the left, they need to be routed behind the regulator in the door. Should be pretty straightforward, just make sure you didn't add extra twists.
Line up the mounting holes and lightly tighten nuts on the top two studs (my new regulator had studs on the top here, hopefully yours does too).
Line up the bottom two mounting holes and thread your bolts in. My kit came with all new hardware for this. Now you can tighten the top two bolts.
Install the window motor in its place. It has two clips that will hold it up while you're working to install the bolts, make sure those are on the door. You can see the clips in red below and finally a good picture of the three motor mount holes in yellow.

Before installing bolts I fished the wire harness through the opening and connected it. Install the three mounting bolts. It is a tough reach to get your hands back there. Tighten the bolts.
Now test the regulator. It should move up and down freely in the door. Bring it in position with the two holes you used to detach the glass from the regulator previously. You can either use 1/4-20 bolts (or equivalent) or rivets to reattach the window. I used bolts.
Reinstall door panel and you're done. Good luck.
This is for a 1993 Chinook / E350.
Removal
First step is removing the door panel.
First remove the visible screw in the upper right and pull the black panel off. Then there are three screws you need to remove to allow the door panel to be removed. Unscrew all of them, and then remove the surround for the door handle. The window switch panel should lift away from the rest and will need to be fished through the opening when you remove the panel itself (do not disconnect the switch panel, you don't need to).
My door panel needed to be lifted up and out, as it is secured with a few "L" shaped pieces of plastic that interface with the metal door. Once you get it off, twist the light bulb out of the socket, fish the window switch panel through and you should be good.
Next is window regulator removal. My window was being held up by a piece of wood (thanks previous owners) but the regulator was still connected to the glass itself. First step is disconnecting the glass from the regulator. Note in the pictures removed my vapor barrier was already compromised by the previous owner, you may need to remove it to access some of these locations. You can either try to gently pry the barrier away, or cut it as my previous owner did. I won't judge you either way.
The black piece in the picture above is attached to the window permanently and is what holds the glass to the regulator. There are two bolts or rivets holding the components together. My regulator was replaced previously and has bolts, but OE is apparently rivets. You need to move the window down far enough to access both the visible bolt/rivet, and the one you can't see here.
The yellow marked holes are where you can access both of the window mount bolts/rivets. Remove those and manually slide the window to the top and tape it in place.
The regulator is held in place by four bolts (blue) and the motor by three (green). Remove the four bolts first, followed by the motor bolts. Disconnect the motor electrical connector (purple). The regulator should then be free to be removed through the large access hole to the left.
Installation
Essentially the opposite of what you just did.
Bring the new regulator into the door. Note the motor sits on the right while the cables exit the track on the left, they need to be routed behind the regulator in the door. Should be pretty straightforward, just make sure you didn't add extra twists.
Line up the mounting holes and lightly tighten nuts on the top two studs (my new regulator had studs on the top here, hopefully yours does too).
Line up the bottom two mounting holes and thread your bolts in. My kit came with all new hardware for this. Now you can tighten the top two bolts.
Install the window motor in its place. It has two clips that will hold it up while you're working to install the bolts, make sure those are on the door. You can see the clips in red below and finally a good picture of the three motor mount holes in yellow.
Before installing bolts I fished the wire harness through the opening and connected it. Install the three mounting bolts. It is a tough reach to get your hands back there. Tighten the bolts.
Now test the regulator. It should move up and down freely in the door. Bring it in position with the two holes you used to detach the glass from the regulator previously. You can either use 1/4-20 bolts (or equivalent) or rivets to reattach the window. I used bolts.
Reinstall door panel and you're done. Good luck.
1993 Chinook Concourse XL
Re: Driver Side Power Window...kaput...
Very helpful!
2000 Concourse dinette, on 1999 6.8L Ford E350 Triton V-10 Chassis